
Easy Guide: Share Your PC’s VPN Connection
Want to use your FreeGuard VPN on other gadgets at home, like your smart TV or game console? This guide shows you how to share the VPN connection from your Windows PC or Mac to other devices on your home network. It’s like turning your PC into a VPN hotspot!
Why Share Your VPN?
Sharing your PC’s VPN connection has some cool perks:
- Use VPN on More Devices: Some gadgets (like older smart TVs or certain game consoles) can’t install VPN apps directly. Sharing lets them use the VPN.
- One VPN for All: Instead of setting up VPN on every device, just set it up on your PC and share it.
- Easy Control: Manage your VPN from one place – your PC.
- Better Speed (Sometimes!): Your PC might be more powerful and handle the VPN connection better than smaller devices.
What You’ll Need
Before we start, make sure you have these:
- FreeGuard VPN installed and working on your computer.
- You’re the admin of your Windows PC or Mac (you can change system settings).
- Your computer is connected to your home internet (Wi-Fi or cable).
- The other devices you want to share the VPN with (e.g., your phone, tablet, smart TV).
Recommended Method: Using FreeGuard VPN’s TUN Mode and LAN Access Features
FreeGuard VPN has built-in powerful TUN mode and LAN access features, which is the simplest and most effective sharing method.
Step 1: Enable TUN Mode and LAN Access in FreeGuard VPN
-
Open the FreeGuard VPN app on your PC.
-
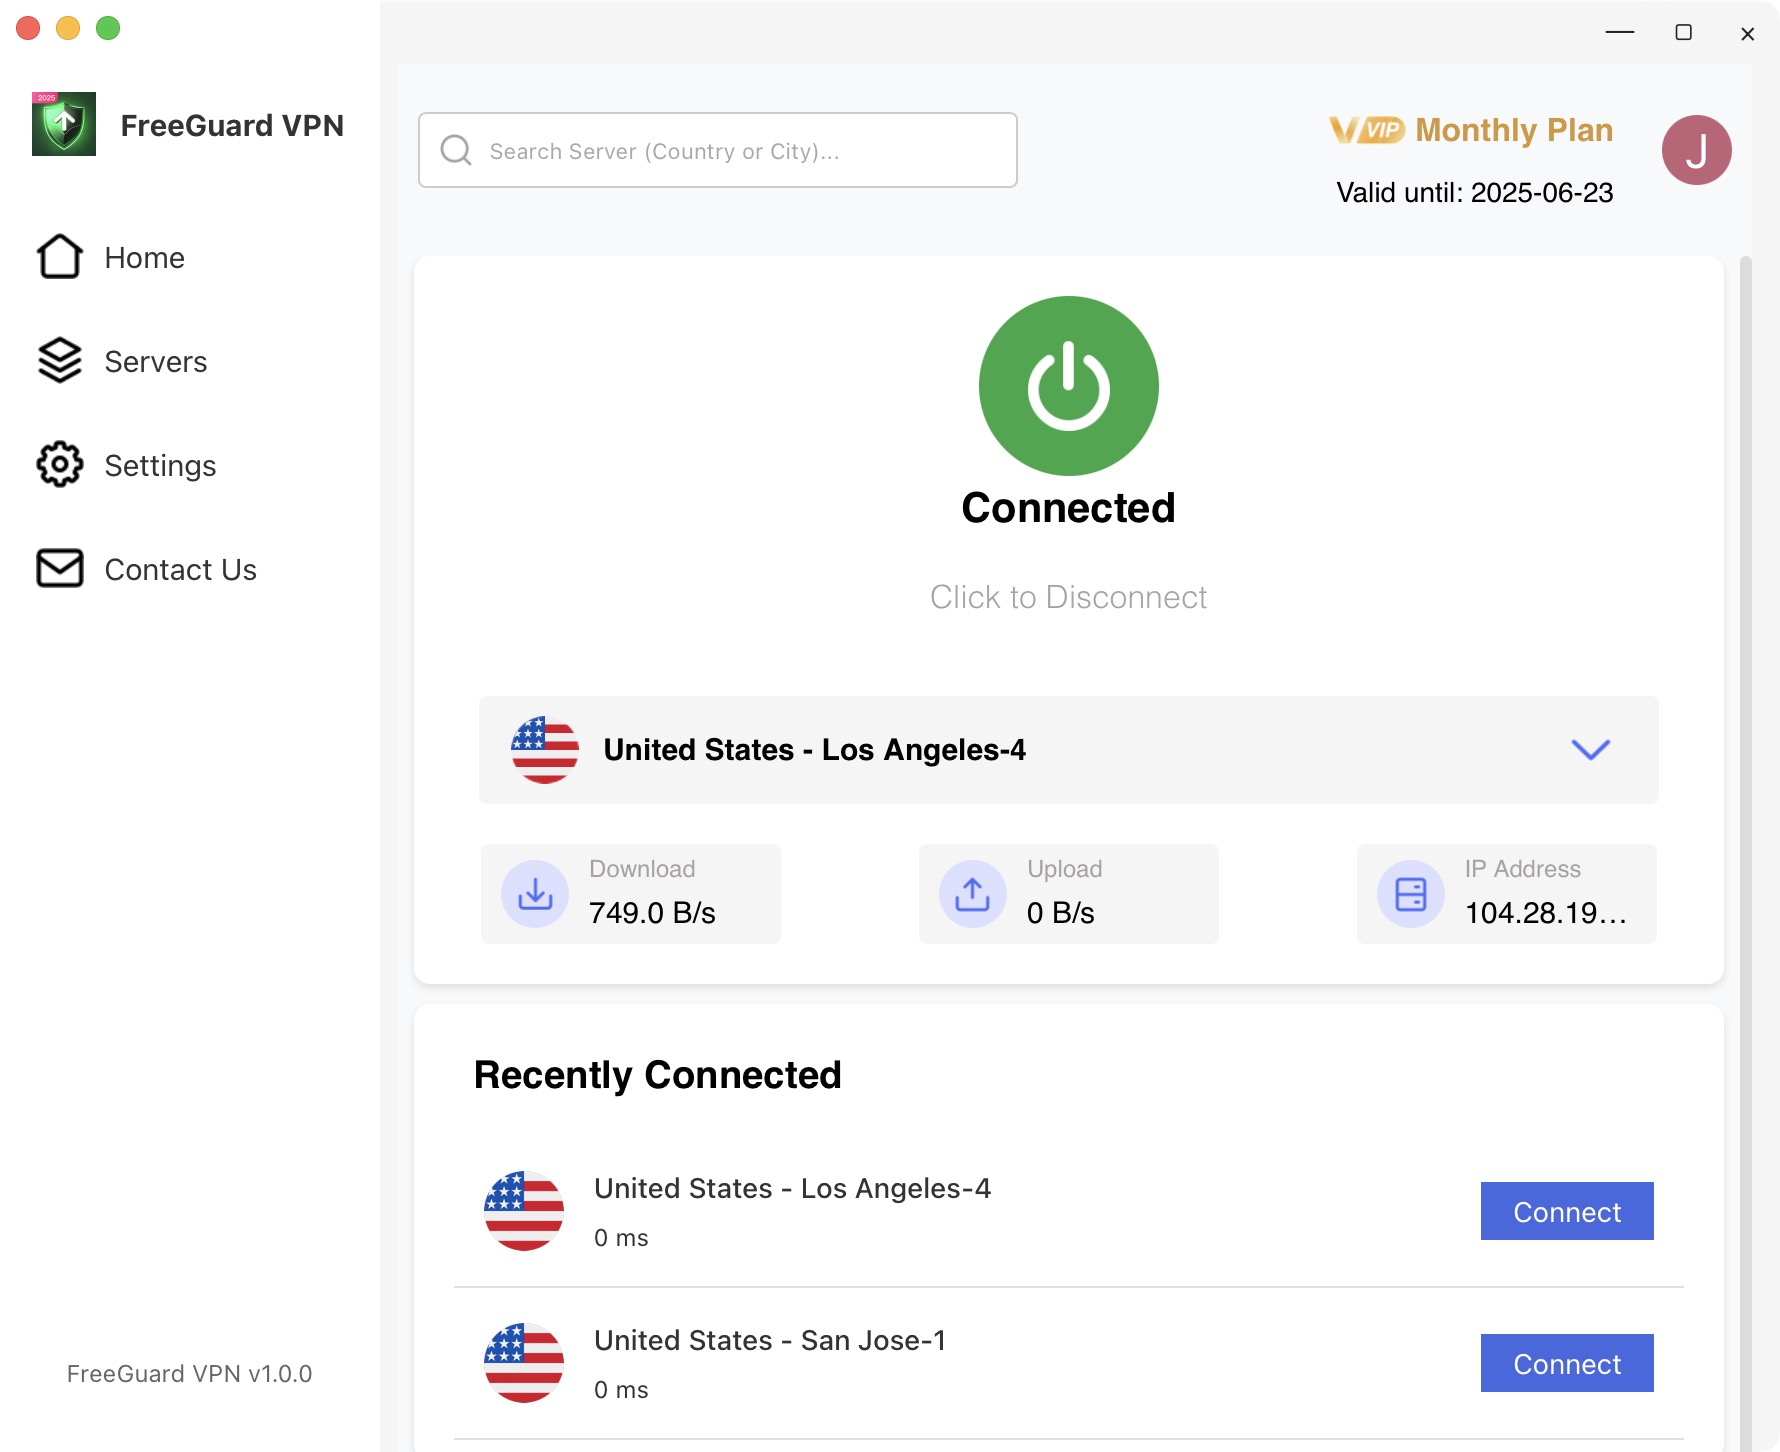
Click the Settings button in the side navigation bar of the app.
-
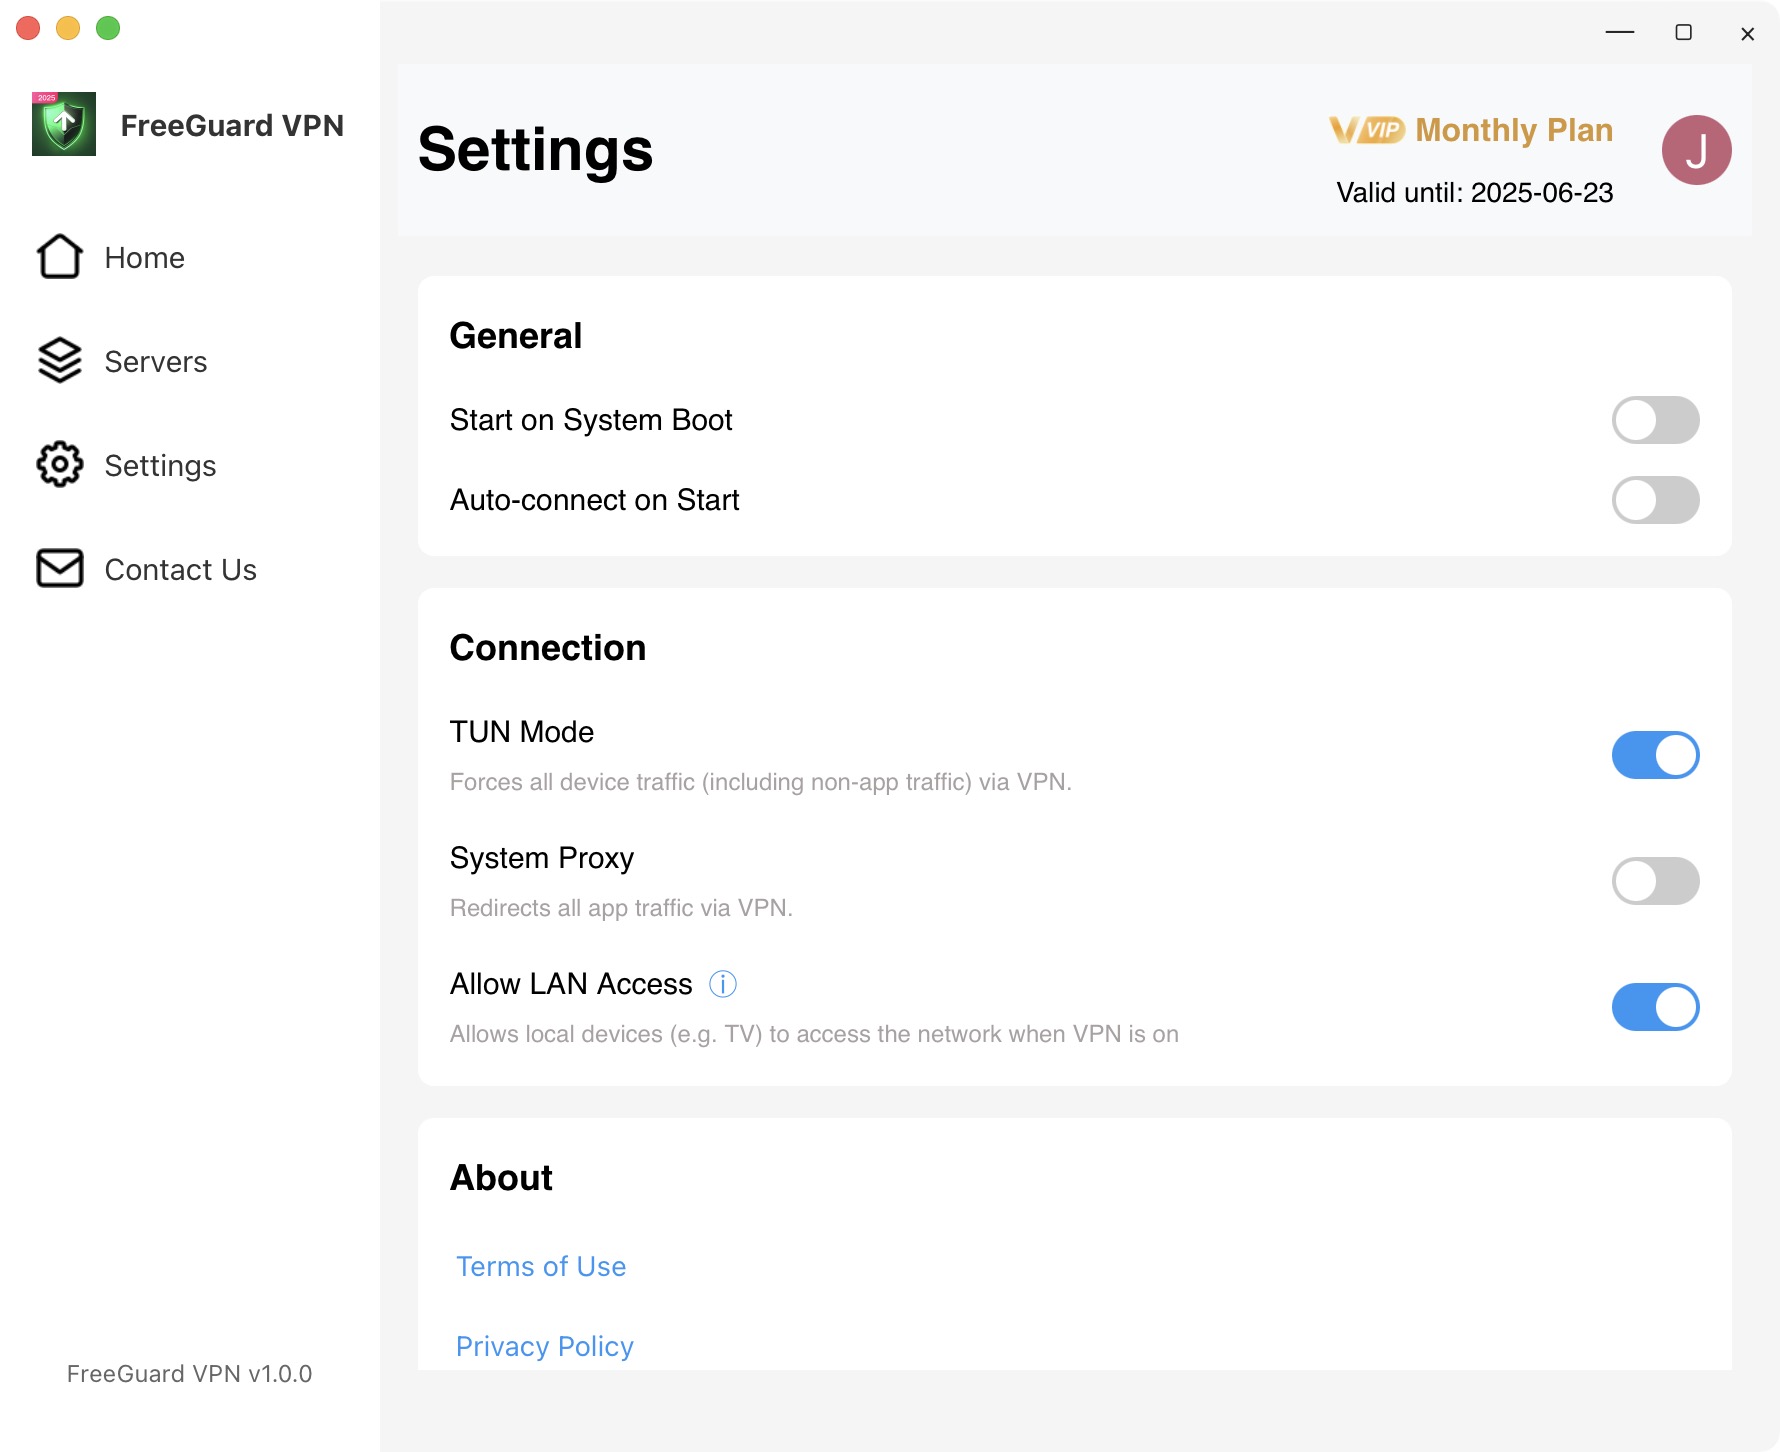
In the settings page, find the TUN MODE switch and click it to turn it blue (enabled state).
-
Similarly, find the ALLOW LAN ACCESS switch and click it to also turn it blue (enabled state).
-
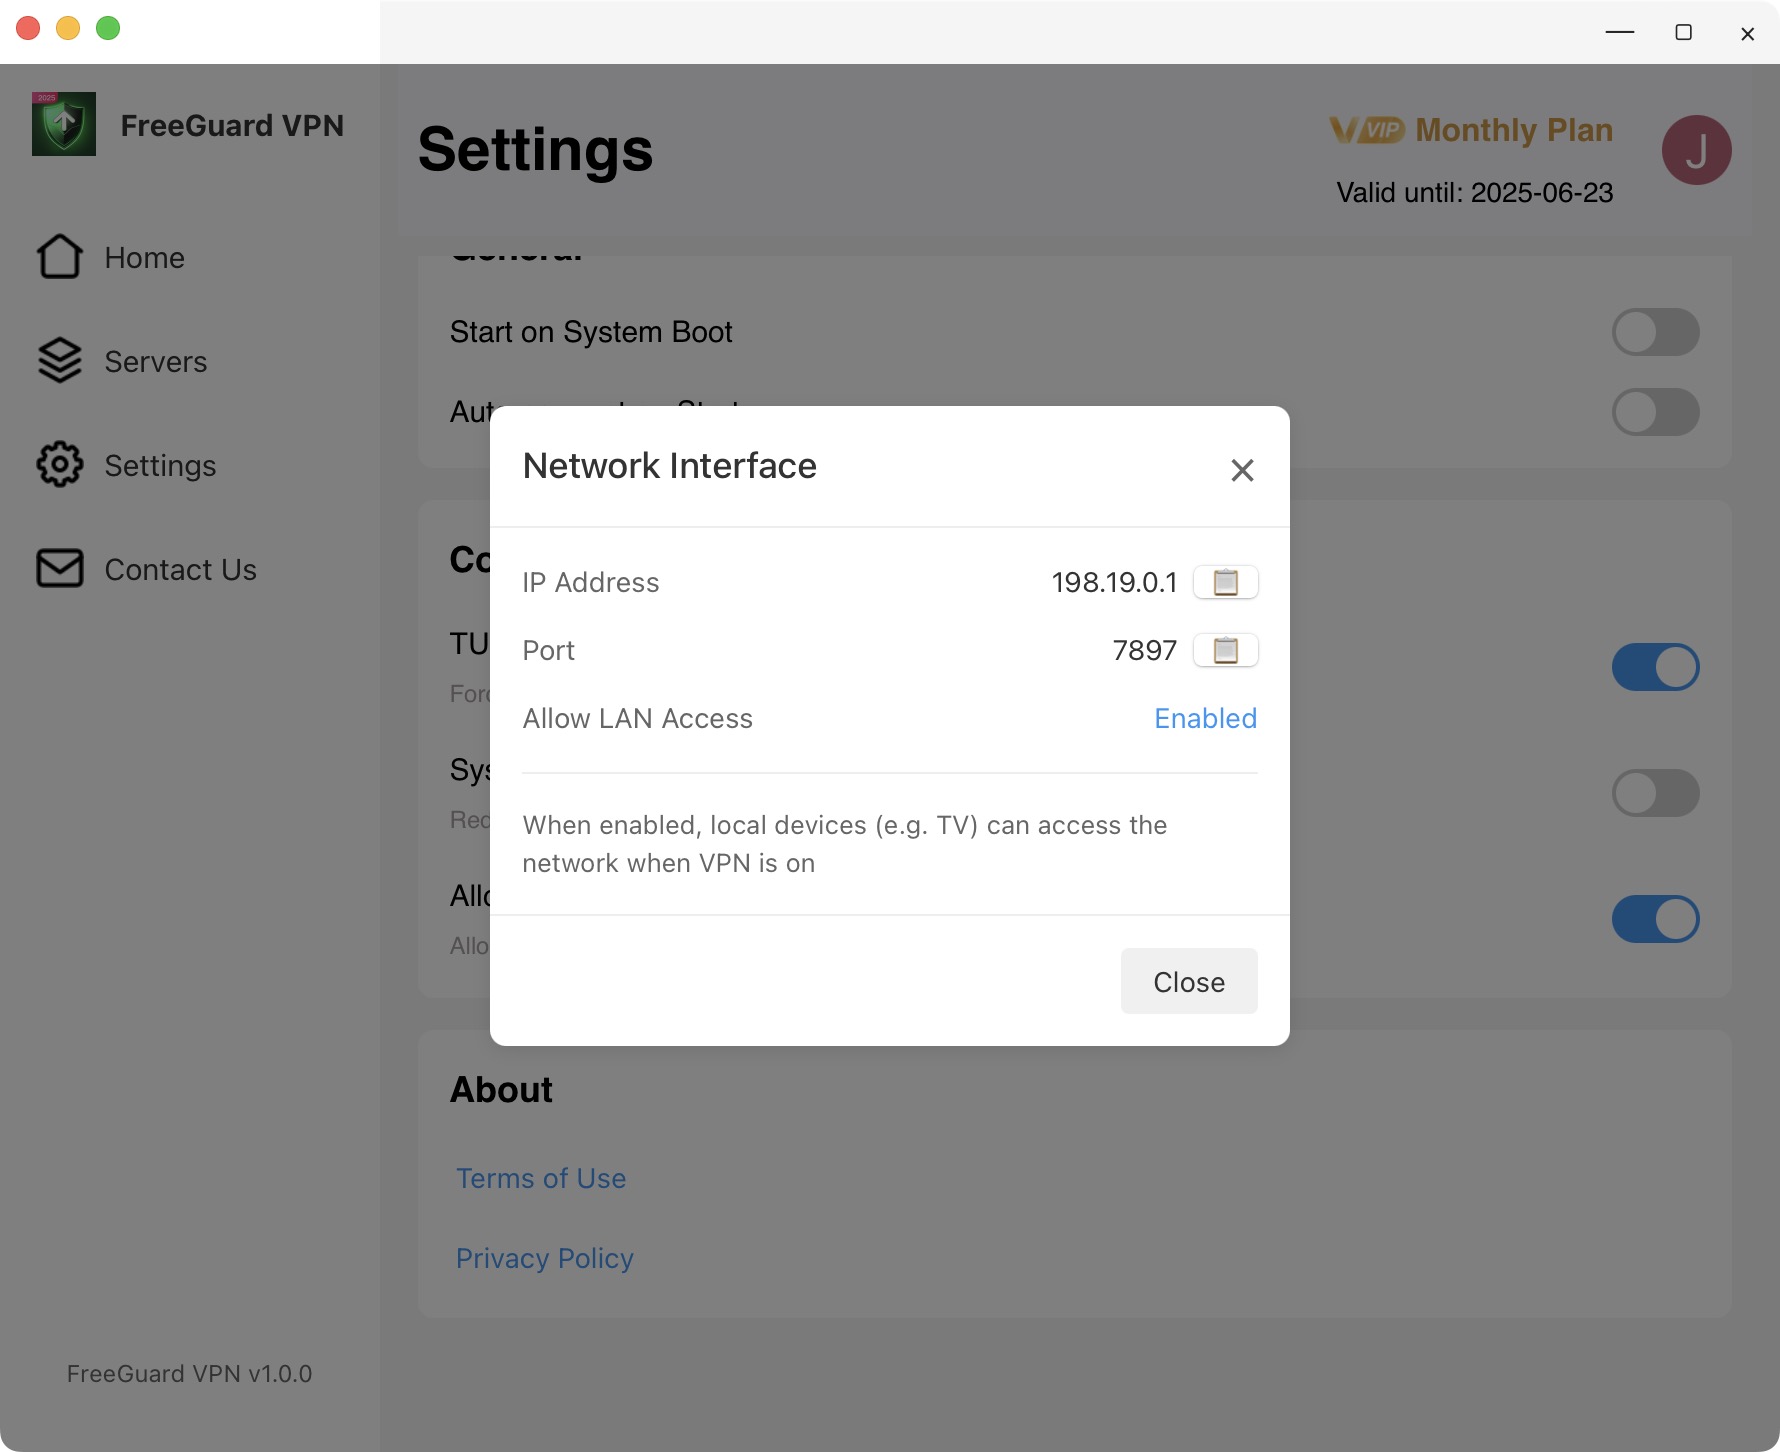
Click the small icon next to ALLOW LAN ACCESS to view the displayed IP address and port number information. Write down these two important pieces of information, for example:
- IP Address:
192.168.1.5 - Port Number:
7890
- IP Address:
Step 2: Configure Manual Proxy on Other Devices
Now you need to configure manual proxy on the devices you want to use VPN with, entering the IP address and port number you just noted down.
Smartphones and Tablets
iPhone/iPad (iOS):
- Go to Settings > Wi-Fi
- Tap the ‘i’ icon next to your connected Wi-Fi network
- Scroll down to find Configure Proxy, select Manual
- Server: Enter the IP address (e.g.,
192.168.1.5) - Port: Enter the port number (e.g.,
7890) - Tap Save
Android Phones/Tablets:
- Go to Settings > Network & internet > Wi-Fi
- Long press the connected Wi-Fi network, select Modify network
- Expand Advanced options, select Manual for proxy
- Proxy hostname: Enter the IP address (e.g.,
192.168.1.5) - Proxy port: Enter the port number (e.g.,
7890) - Tap Save
Smart TV Brand Configurations
Samsung Smart TV:
- Press the Menu or Settings button on your remote
- Go to Network > Network Settings > Wireless
- Select your Wi-Fi network, enter Advanced Settings
- Find Proxy Settings, select Manual
- Enter proxy server address and port
LG Smart TV:
- Press the Settings button (gear icon) on your remote
- Go to Network > Wi-Fi Connection
- Select the connected network, click Advanced Settings
- Enable Proxy, select Manual Setup
- Enter proxy server and port information
Sony Smart TV:
- Press the HOME button on your remote, go to Settings
- Select Network & Internet > Network
- Select your Wi-Fi connection, enter Advanced Options
- Find Proxy Settings, select Manual
- Enter proxy information
TCL Smart TV:
- Go to Settings > Network
- Select Wireless Network, find the connected network
- Enter Advanced Settings or More Options
- Find Proxy Settings, select Manual Configuration
- Enter proxy server address and port
Hisense Smart TV:
- Press the Settings button on your remote
- Go to Network > Network Configuration
- Select Advanced Settings for Wi-Fi network
- Enable Proxy Server, select Manual
- Enter proxy information
Xiaomi TV:
- Go to Settings > Network & Connection
- Select Wi-Fi, click the connected network
- Select Modify Network > Show Advanced Options
- Select Manual for proxy
- Enter proxy server and port
Gaming Console Configurations
PlayStation 5 (PS5):
- Go to Settings > System > Network
- Select Set Up Internet Connection
- Select your Wi-Fi network, choose Advanced Settings
- In Proxy Server option, select Use
- Enter proxy server address and port
PlayStation 4 (PS4):
- Go to Settings > Network > Set Up Internet Connection
- Select Use Wi-Fi > Custom
- Select your Wi-Fi network, choose Automatic for other settings
- In Proxy Server option, select Use
- Enter proxy server address and port
Xbox Series X/S:
- Press the Xbox button on controller, go to Settings
- Select Network > Network Settings
- Select Advanced Settings > Proxy
- Select Manual Setup
- Enter proxy server information
Xbox One:
- Go to Settings > Network > Network Settings
- Select Advanced Settings
- Select Proxy > Manual
- Enter proxy server address and port
Nintendo Switch:
- Go to System Settings > Internet
- Select the connected network
- Select Change Settings
- Find Proxy Settings, select On
- Enter proxy server information
TV Boxes and Streaming Devices
Xiaomi Box:
- Go to Settings > Network & Connection
- Select Wi-Fi, click the connected network
- Select Modify Network > Advanced Options
- Select Manual for proxy
- Enter proxy information
Huawei Box:
- Go to Settings > Network
- Select Wi-Fi settings, click the connected network
- Select Advanced Settings
- Enable proxy, select Manual Configuration
- Enter proxy server and port
Apple TV:
- Go to Settings > Network
- Select your Wi-Fi network
- Scroll down to find Configure Proxy
- Select Manual
- Enter server and port information
Amazon Fire TV Stick:
- Go to Settings > Network
- Select your Wi-Fi network
- Select Advanced > Proxy Settings
- Select Manual
- Enter proxy information
Roku Devices:
- Go to Settings > Network
- Select your wireless network
- Select Advanced System Settings > Network Proxy
- Select Manual Setup
- Enter proxy server information
NVIDIA Shield TV:
- Go to Settings > Network & Internet
- Select your Wi-Fi network
- Select Modify > Advanced Options
- Select Manual for proxy
- Enter proxy information
Solving Common Problems
“My other devices can’t connect!”
- Same Network?: Make sure your PC and the other device are on the exact same Wi-Fi network.
- Firewall?: Your PC’s firewall (like Windows Defender Firewall) might be blocking the sharing. You might need to add an exception for FreeGuard VPN.
- Still Enabled?: Double-check that “TUN MODE” and “ALLOW LAN ACCESS” are still in blue enabled state in the FreeGuard app.
“The internet is super slow on the shared devices!”
- PC Power: Your PC is doing extra work. If it’s an older PC, it might struggle.
- Wired vs. Wi-Fi: If possible, connect your PC to the router with an Ethernet cable instead of Wi-Fi. This is usually faster and more stable.
- VPN Server Location: Try connecting FreeGuard VPN to a server geographically closer to you.
“The connection keeps dropping!”
- PC Sleep Mode: Make sure your PC isn’t set to go to sleep or hibernate automatically. If it sleeps, the shared connection will drop.
- VPN Time Limits: Some VPNs (usually free ones) have time limits. FreeGuard’s paid plans shouldn’t.
How It Works (Simplified Diagrams)
Sharing Setup (Big Picture)
Your PC acts as a bridge between your devices and the VPN server.
How TUN Mode Proxy Works (Step-by-Step)
Your PC (with TUN Mode and LAN Access enabled) takes requests from your other devices, sends them through the VPN, and then passes the results back to your devices.
Important Security Notes
When sharing your VPN:
- Trust is Key: All devices using the shared connection are trusting your PC’s security.
- PC Compromise = Risk: If your PC gets a virus or is hacked, the shared VPN connection could also be at risk.
- Safe Networks Only: Only share your VPN on networks you trust (like your home Wi-Fi) and with devices you trust.
- PC Sees Traffic: The PC sharing the connection can, in theory, see the internet activity of the devices using its shared connection. FreeGuard VPN itself has a no-logs policy for what it sees, but the sharing PC is a different matter.
Still Need Help?
If you’re stuck or have questions:
- Check our Frequently Asked Questions (FAQ) page.
- Email us at FreeGuard VPN Support.
Last updated: May 23, 2025